
You Are Not Along with Fqtag.com Issue
If you are stuck with something called Fqtag.com, you are not alone. Recently lots of computer users have been plagued by redirecting issues and slammed with pop-up telling this annoying site while using the browsers. Dire to know what's going on and how to get it removed completely? Relax, you will find out the answers soon.
"Fqtag.com was in my frequently visited website and I clicked on the link and all it shows is a -1 on the page. My chrome keeps crashing and internet explorer runs extremely slow. I scanned using Malwarebytes Anti-Malware and it says nothing is detected. Please help!"
.jpg)
Never Take Fqtag.com Slightly
For the good of your browser security, you are supposed to get Fqtag.com killed speedily. If you have no clue how to deal with this browser intruder, you could take a minute to follow the removal tutorials. Stick to the tips and you will get rid of this non-sense soon.
You Could Eliminate Fqtag.com Pop-up Manually
Solution One: Remove Add-on & Reset your browser
The showing of such pop-up indicates that there is something unwanted (adware/malware) installed on your browser. To remove the Ads, in general, you just need to delete/disable the add-on bundled by this webpage or reset your browser.
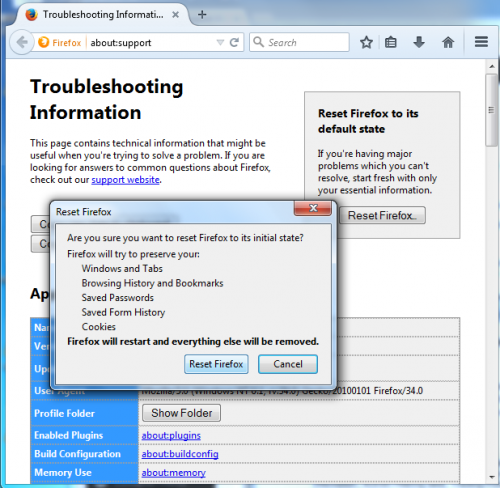
Reset Firefox settings:
1) Click on the orange Firefox icon->> choose Help ->>choose Troubleshooting information
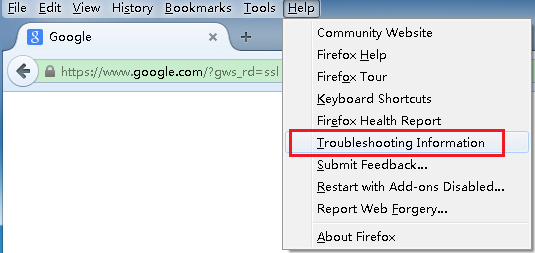
2) Click on Reset Firefox. Choose Reset Firefox again to make sure that you want to reset the browser to its initial state.
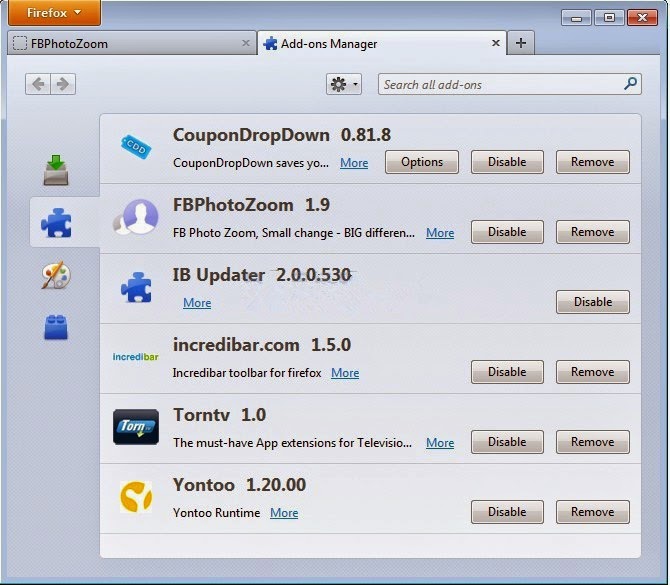
Remove Firefox Extension
Remove relevant Extension:
1) Click on the Tools -> select Add-ons;
2) Go to Extensions tab ->right click on [ the extension promoting Ads ] ->select Remove;
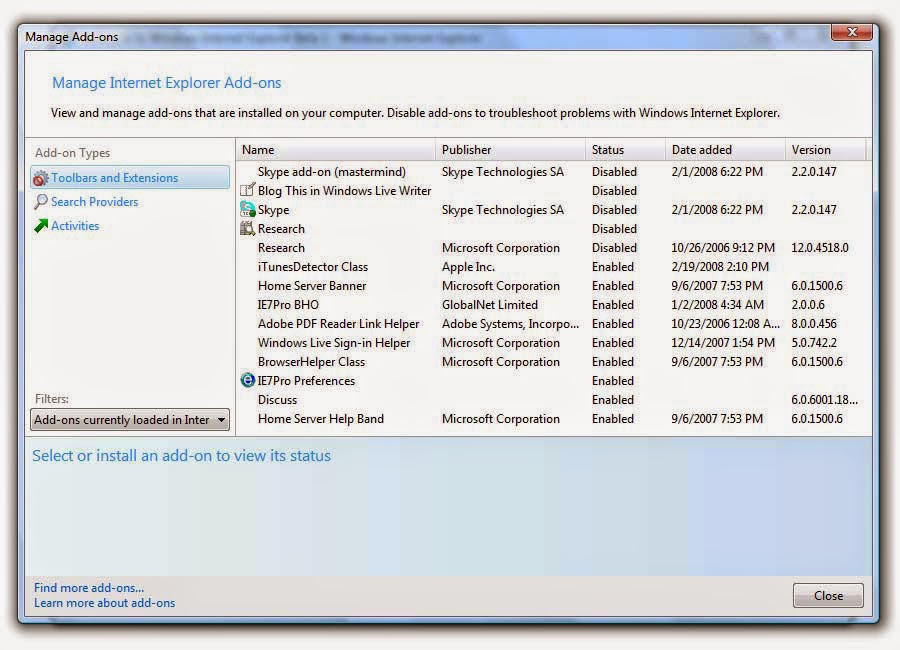
Disable add-on on IE or Reset IE settings:
Disable relevant Extension:
1) Click on the Tools -> select Manage Add-ons;
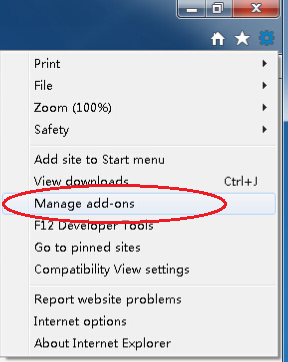
Disable in the drop-down menu;
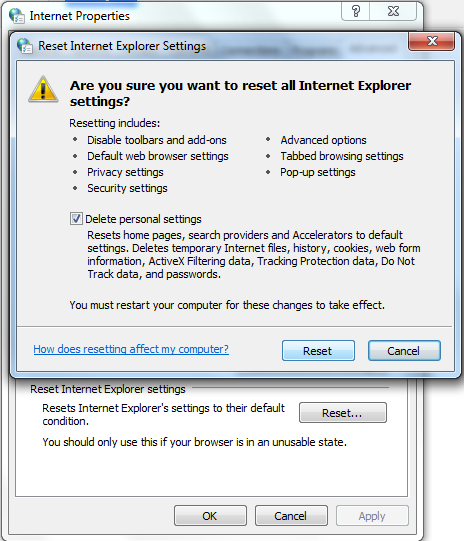
Reset IE settings:
1) Select the following options one by one: Tool ->> Internet Options ->> Advanced ->> Reset
2) On Reset IE settings tab, tick Delete personal settings, click Reset button.
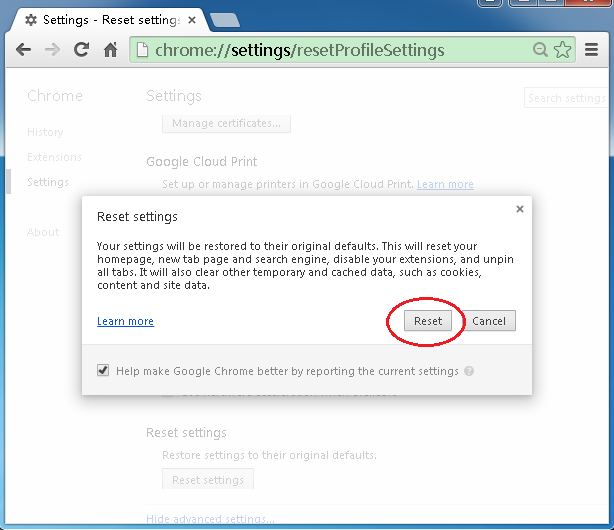
Remove Chrome Extension or Reset Chrome settings:
Remove Extension from your browser:
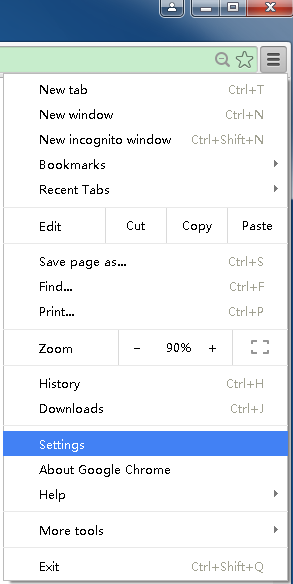
a) Click on “Customize and Control” icon-> select Settings;
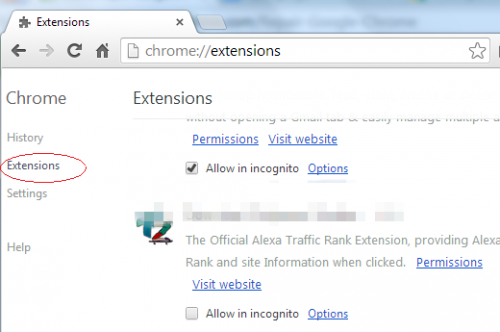
b) Go to Extensions ->right click on [ the suspected item ] (If there is one) ->select Remove menu;
Reset your browser settings:
a) Go to Settings, and scroll down to the bottom of the page, Show advanced settings
b) Scroll down to the end of the page once again, click Reset settings.
Sometimes this ad-supported program is tricky enough and still comes back or won’t let you reset your browser, and then you may fail to stop it in this way. In this case, you are supposed to handle with its files and registry stuff.
Solution Two: Remove adware related files and entries
Step 1. Disable any suspicious startup items
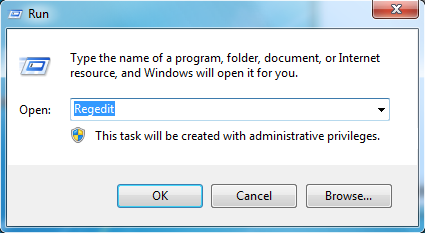
Click Start menu -> click Run -> type: msconfig in the search bar -> open System Configuration Utility -> Disable all possible startup items including those of this browser adware.

Step 2. Find out and delete associated files
%ProgramData%\*.
%CommonProgramFiles%\ComObjects*.exe
%windir%\SeviceProfiles\LocalService\AppData\Local\Temp\random.tlb
Step 3. Delete fake pop-up relevant entries
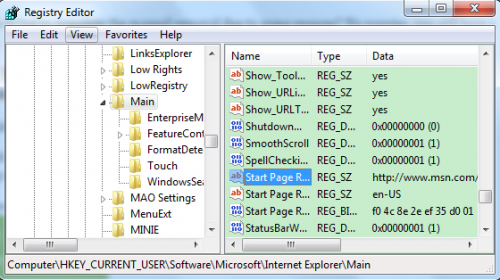
Computer\HKEY_CURRENT_USER\Software\Microsoft\Internet Explore\Main
(If you are not skillful enough to complete the above manual removal process, you might as well use the best malware removal tool - SpyHunter. This tool specializing in detecting and erasing the unwanted automatically will help you out efficiently.)
You Could Also Erase Fqtag.com Pop-up Automatically
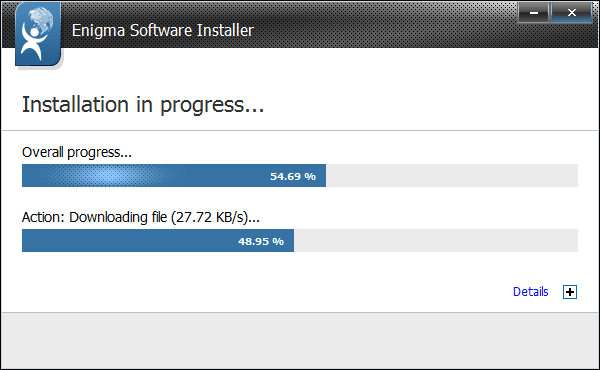
Step 1. Click the icon below to download Fqtag.com pop-up remover SpyHunter

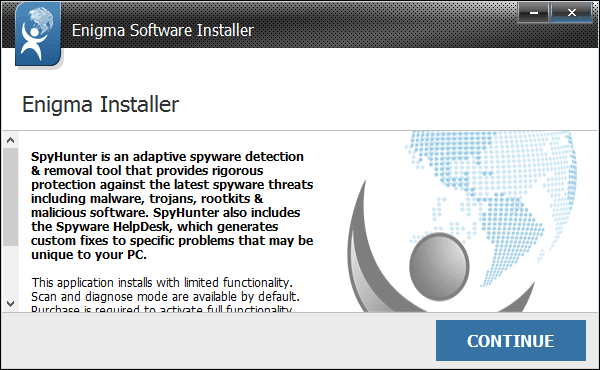
Step 3. Run SpyHunter to scan for this self-invited guest
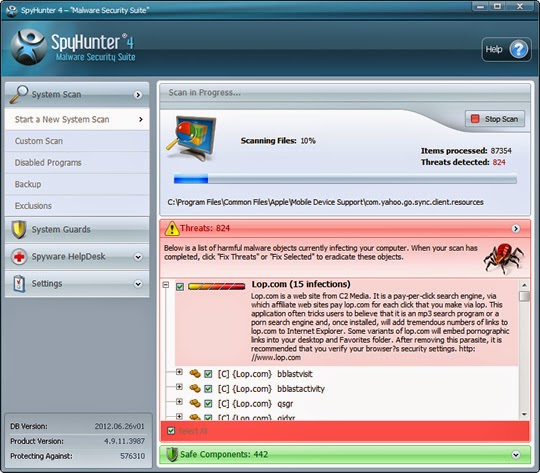
Step 4. After scanning, click the built-in "Fix Threats" button to automate the whole removal process and get rid of all detected items.

If you are a Mac OS User:
Step 1. Quit the app that generates the malicious processes
Choose Force Quit from the Apple menu, or press Command + Option + Esc together to open the Force Quit Applications window to do this.

Step 2. Uninstall unwanted/suspicious application that might be the initiator of the evil

Step 3. Reset Safari
a) Open your Safari browser from the dock.
b) Click on Safari in your Safari menu at the top of your screen.
c) A drop-down menu will now appear. Choose the option labeled “Reset Safari…”

Warning: Care must be given when you are following this step. Don't empty your Trash until you've determined that everything is working OK, in case you need to restore something you deleted by accident. If you are not confident in doing the manual removal by yourself, you could think about using the utility software suite for Mac OS - MacKeeper.
Step 5. Download and install malware security suite - MacKeeper to your Mac.

Sincerely Advise:
Please never belittle anything performing malicious hijacking like Fqtag.com. If you are puzzled by the manual removal steps and in need of a much efficient way, you could consider starting an automatic removal with SpyHunter or MacKeeper.
No comments:
Post a Comment