
Stuck at hxtp://xn--koa.net/proxy.pac or hxtp://ɴ.net/proxy.pac?
hxtp://xn--koa.net/proxy.pac or hxtp://ɴ.net/proxy.pac issue having been reported to bother lots of computer users deserves attention. Riddled with such proxy.pac having been detected as malicious (by ADMINUSLabs, Antiy-AVL, BitDefenders) and with skills to modify the computer settings without permission, computer users may find something is continuing to set their LAN Settings to use the proxy PAC detailed and they will have trouble using their browsers normally.
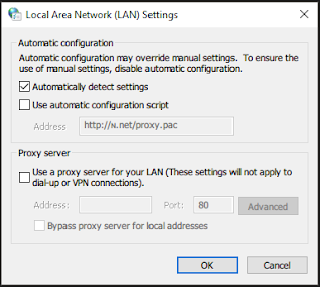
Being a victim, you may find that your LAN settings keep going to "Use Automatic Configuration Script" and "hxtp://xn--koa.net/proxy.pac" or "hxtp://ɴ.net/proxy.pac" appears in the box. Your web browser may work out of normal for with this proxy slowing down the browser and redirecting your search traffic resumed. This proxy.pac issue is triggered by certain malware that runs as a proxy and will keep modifying the default HTTP proxy. You may always get pop-up alert reporting the detection of win32/proxychanger.tf trojan and Hijack.AutoConfigURL.PrxySvrRST.
Anything haunting and wrecking havoc on your computer and browser deserves to be very dead. Need assistance deactivating/getting rid of such proxy.pac? You could try the following tutorials including manual and automatic removal steps.
You Could Get Rid of hxtp://xn--koa.net/proxy.pac or hxtp://ɴ.net/proxy.pac Manually
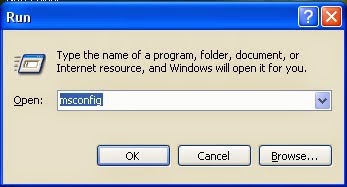
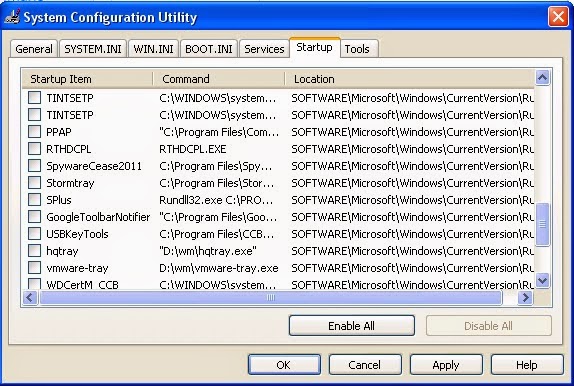
Tip 1. Disable suspicious startup created by this proxy.pac
Click Start menu ; click Run; type "msconfig" in the Run box; click Ok to open the System Configuration Utility; Disable all possible startup items generated.
Tip 2. Delete redirect page from Registry Editor
a) Click Start menu and type regedit in Search Programs and files box, and then hit Enter to get Registry Editor Window

find out this proxy crap and others related to delete completely
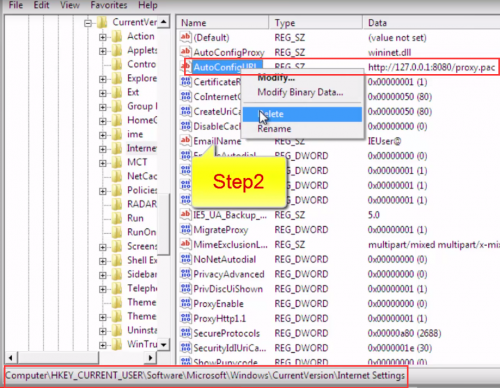
HKLM\Software\Microsoft\Windows\CurrentVersion\RunMicrosoft Internet Acceleration Utility
HKCU\Software\Microsoft\Windows\CurrentVersion\Internet SettingsProxyOverride
HKCU\Software\Microsoft\Windows\CurrentVersion\InternetSettingsProxyServern.net hxtp://xn--koa.net/proxy.pac or hxtp://ɴ.net/proxy.pac, 49541, Outbound, C:\Program Files (x86)\Google\Chrome\Application\chrome.exe
hxtp://xn--koa.net/proxy.pac or hxtp://ɴ.net/proxy.pac, 49572, Outbound, C:\Program Files (x86)\Google\Chrome\Application\chrome.exe
hxtp://xn--koa.net/proxy.pac or hxtp://ɴ.net/proxy.pac, 61528, Outbound, C:\Program Files (x86)\Google\Chrome\Application\chrome.exe
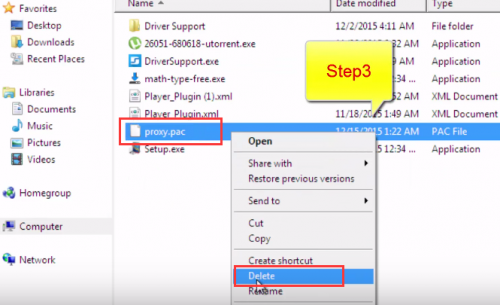
Tip 3. Open User Folder from C Drive, and find out proxy.pac file, delete it
Tip 4. Reset your browsers one by one
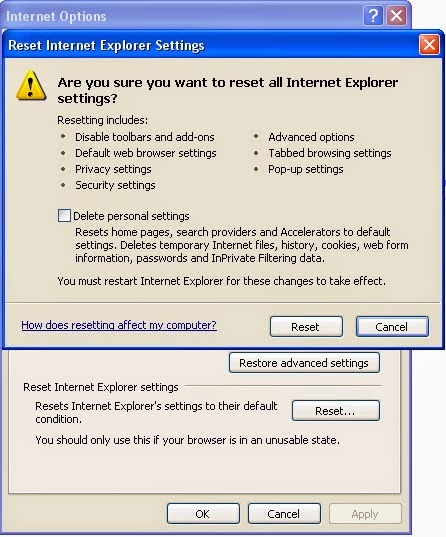
Internet Explorer:
a) Click Start, click Run, in the opened window type "inetcpl.cpl".
b) Click "Advanced" tab, then click Reset.
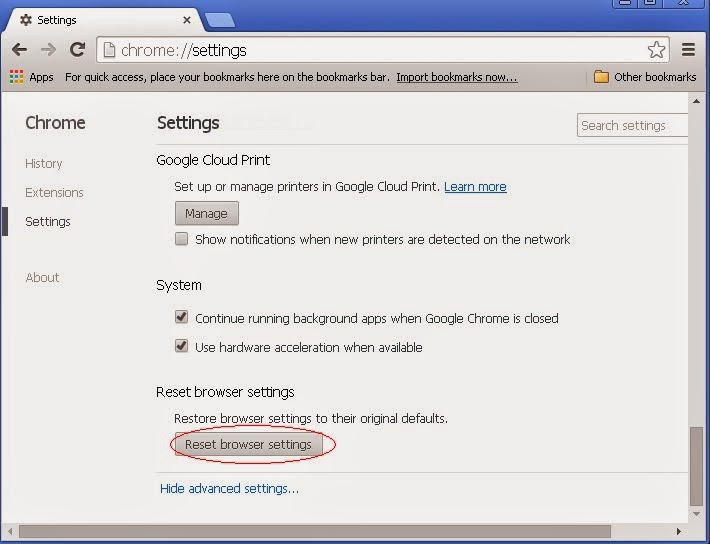
Chrome:
Click the Chrome menu on the browser toolbar and select Settings:
a) Scroll down to the bottom of chrome://settings/ page and click Show advanced settings
b) Scroll down to the bottom once again and click Reset Settings
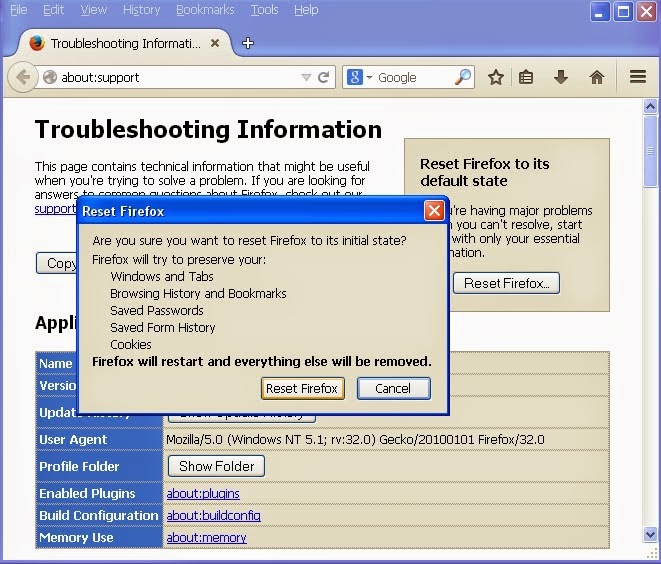
Mozilla FireFox:
Click on the orange Firefox icon->> choose Help ->>choose Troubleshooting information
a) Click on Reset Firefox. Choose Reset Firefox again to make sure that you want to reset the browser to its initial state.
b) Click Finish button when you get the Import Complete window.
If you fail to reset the browser directly, you may need to deal with adware related startup and entries.
(If you are not skilled in fixing manually, relax, you are highly advised to get the most popular removal tool - SpyHunter for assistance. The tool specializing in detecting and removing all kinds of PUPs will help you out efficiently.)
Erase hxtp://xn--koa.net/proxy.pac or hxtp://ɴ.net/proxy.pac Automatically with SpyHunter
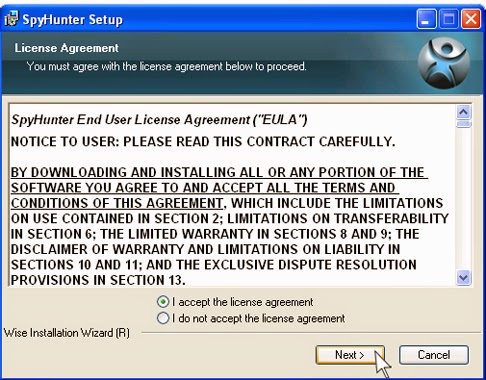
Tip 1. Download outbound removal tool SpyHunter

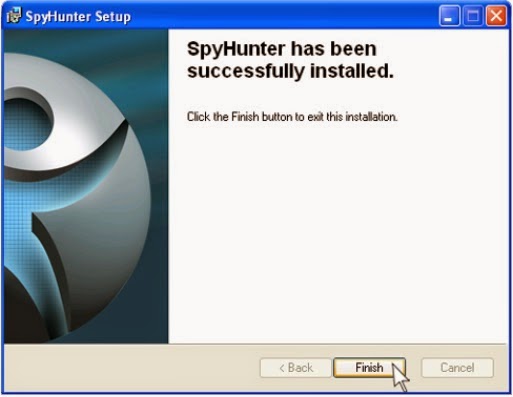
(Double click on the download file and follow the prompts to install the program.)

.jpg)
Tip 3. Run SpyHunter to scan your PC
After the installation, run SpyHunter and click "Malware Scan" button to start a full or quick scan.
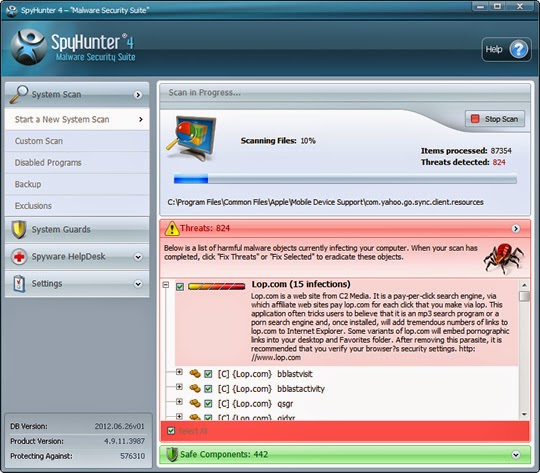
Tip 4. Finally click on the built-in “Fix Threats” to get all detected items deleted.

Sincerely Remind:
a) You are not advised to deem lightly anything haunting and triggering alert like hxtp://xn--koa.net/proxy.pac or hxtp://ɴ.net/proxy.pac. If you fail to finish the manual removal due to any reason, you could think about using the free scanner SpyHunter.
b) The recommended free scanner is for malware detection only. If this security tool detects the threats and you need its automatic removal function, you could consider to activate this security tool to purge your computer efficiently.
No comments:
Post a Comment